Importing requirements and requirement documents from Microsoft Word
You can import requirements from a Microsoft Word document into Perforce ALM. When you import a Word document, you can create a new requirement document or import requirements into an existing document in the ALM project.
On this page:
Tasks for importing requirements
1. Prepare the Word document and the ALM project.
2. Use the import wizard to choose the file to import, how to identify and treat new requirements, and the Word document sections to import. You can also preview the import and choose to save the requirements in a new or existing document.
3. Review the imported requirements and set additional field values.
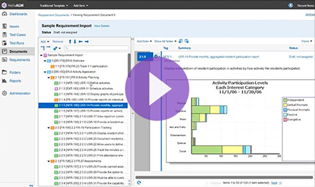
Watch video: Importing Word Documents into Perforce ALM
Before importing
Perform the following tasks before importing.
- Prepare the Word document to ensure a better import process and resulting ALM document. See Tips for Importing Microsoft Word Requirement Documents.
- Create all requirement types used in the Word document in ALM. This helps streamline the process of mapping content in the Word document to ALM requirement types. See Adding requirement types.
Choose the file to import and an optional import template
1.Click Administration.
The Admin Home page opens.
2. Click Microsoft Word Import.
The Microsoft Word Import dialog box opens.
3. In the File to import area, click Browse to select the file to import or drag and drop the file in the box. The file must be .doc or .docx format.
The file is uploaded to the ALM Server. To clear the selected file, click  next to the filename.
4. To use settings from a previous import, in the Import template area, click Browse to select the import template or drag and drop the file in the box. The file must be .itm format.
To clear the selected file, click next to the filename.
5. Click Next.
- If you are using an import template, preview the imported requirements.
- If you are you are not using an import template, choose how to identify and treat new requirements.
Choose how to identify and treat new requirements
ALM divides the imported Word document into individual requirements. Specify how ALM should interpret the Word document contents to add new requirements. It depends on if the requirements are organized using styles or items in a numbered list.
Styles
1. If requirements in the Word document are formatted using styles, select Selected styles.
During the import, ALM will add a new requirement for each paragraph in the Word document that uses a style mapped to a requirement type.
2. Click Next.
3. Map the Word styles to ALM requirement types. For each style that starts a new requirement, select the Requirement Type to map the style to.
The first paragraph with the corresponding style applied is used as the requirement Summary value. Subsequent paragraphs are used as the requirement Description value until a paragraph that uses a style mapped to a requirement type is found, which creates another new requirement. You must map at least one style to a type.
4. Click Next to continue to select the Word document sections to import.
Items in a numbered list
1. If requirements in the Word document are formatted using numbered lists, select Items in numbered lists.
During the import, ALM will add a new requirement for each numbered list item in the Word document.
2. Select the Numbered List Item Options to specify how bulleted text is formatted and the default requirement type.
- Default requirement type specifies the type for each new requirement in the ALM document. Select the most used requirement type in the document. You can change the type for individual requirements when previewing the import.
- Make each bullet a separate requirement adds a new requirement for each bulleted item in the Word document. If this option is not selected, bulleted lists are included as requirement description text under the parent list item.
3. Click Next to continue to choose the Word document sections to import.
Choose the Word document sections to import
1.Select which sections of the Word document to import.
- All sections imports all sections from the document.
- Selected sections imports only the selected sections. Set the starting and ending sections.
2. Click Next to continue to preview the import.
Preview the import
1. Select a requirement to preview it how it will be imported. Make any changes.
Click  to expand the requirements tree or click
  to collapse it. You can also search for a requirement.
- To change a requirement’s type,
- To remove a requirement from the document, select it and click
2. Click Next to continue to choose the document to add requirements to.
Choose the document to add requirements to
1.Choose to add the imported requirements to a new or existing document.
- To add the requirements to a new document, select Add a new requirement document and enter the Document name. You can enter up to 255 characters. To add the document to a public folder, select Add to
- To add the requirements to the end of an existing document, select
2. Click
After importing
You may want to perform the following tasks after the import is complete.
- Review the new or updated document and create a snapshot before the imported requirements start to change. Snapshots are used for comparing document versions and viewing differences between them. See Creating requirement document snapshots.
- Update the imported requirements by setting field values and moving them to the correct workflow status. See Editing requirements and Moving requirements and documents through the workflow.
- If you created a new document, set any additional document field values. See Editing requirement document details.
Additional information
If the Word document contains inserted objects, such as Microsoft Excel spreadsheets or PowerPoint presentations, they are displayed inline in imported requirements to match the source document. The objects are also attached to the imported requirements.
- Inserted objects that are embedded and maintained in the Word document are imported as requirement attachments named OLEObject. If multiple objects of the same type are imported, a number is appended the attachment filename and incremented for each object (e.g, OLEObject.xlsx, OLEObject_1.xlsx, OLEObject_2.xlsx, etc.).
- Inserted linked objects from an external source are imported with the linked file attached to the requirements. If a linked object is included in multiple requirements, a number is appended to the attachment filename and incremented for each instance of the object (e.g., UserStatistics.xlsx, UserStatistics_1.xlsx, etc.)