Importing text files
You can import text files that include items or user records exported from other Helix ALM projects or external applications. Before importing, you must map fields in each item to fields in the project you are importing to. This ensures field values are correctly populated in imported items and lets you exclude fields not used in the destination project.
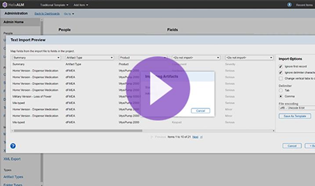
Watch video: Importing Text Files into Helix ALM
1. Click Administration.
The Admin Home page opens.
2. Click Text Import.
The Text Import dialog box opens.
3. Select an Item type to import.
4. In the File to import area, click Browse to select the file to import or drag and drop the file in the box. The file must be .txt or .csv format.
To clear the selected file, click  next to the filename.
5. If you saved the settings from a previous text import in a template, in the Import template area, click Load Template to select the template to use or drag and drop the file in the box.
To clear the selected template, click  next to the filename.
6. Click Preview.
The Text Import Preview dialog box opens. 10 records are displayed. Click the arrows at the bottom of the dialog box to navigate between pages.
7. Map the data in the text file to fields in the project. Above each column, select the field in the project to add the column values to. Select <Do not import> if you do not want to import the data in a column.
These mappings specify how to populate field values in the imported items. Helix ALM does not validate data imported from text files, so it is important to carefully map fields to avoid adding items with incorrect field values.
In imported items, excluded fields are set to the default value configured in the project. If a default value is not configured, <not set> is displayed in the field.
8. Select the Import Options.
- Ignore first record ignores the first record in the file, which usually contains field names.
- Ignore delimiter characters enclosed in quotes ignores delimiter characters in text enclosed in quotation marks, which are usually inserted around comma- and tab-delimited values in exported items. For example, a user field value may be exported from an issue as "Adams, Abby". If this option is not selected, Adams and Abby are imported as separate values if the comma delimiter is used for the import.
- Change vertical tabs to carriage returns restores the formatting of multi-line text fields. Some applications map carriage returns in multi-line fields to vertical tab characters.
- Delimiter specifies the character set used to separate field values.
9. Select the File encoding to indicate the character set to use to interpret the file's contents.
10. To save the settings for future imports, click Save As Template to create and download a text file import template ( TextImportTemplate.itm). See Creating text file import templates.
11. Click Import.
The import starts and the status is displayed as items are imported. A success message is displayed if the import is successful. Click OK.
If there are problems with the import, the Text Import Warnings and Errors dialog box opens. Click Save to open or download (depending on the browser) a text file (text-import-errors.txt) that contains the warnings and errors.
