Attaching files
You can attach any type of file to items. For example, you may want to attach a flowchart, diagram, or screen mockup. Or, you may want to attach a screen capture to show the final result after performing a test. To attach files to workflow events, see Attaching files to workflow events.
Note: You can attach automated tests to test cases. These files are attached on the Scripts tab. See Attaching automated test scripts to test cases.
1. Go to the file attachments area when adding or editing an item.
- Documents, requirements, test cases, and test runs—Click the Files tab.
- Issues—Click the Details tab and scroll to the Attachments area.
2. Click Attach.
The Add Attachments dialog box opens.
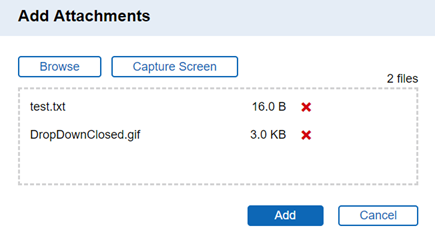
3. Click Browse to select the files to attach. You can also paste the files or drag and drop them. To remove a file, click  next to it.
If you are pasting a file, make sure you select the drop area first. You can only paste images from the clipboard.
Note: To capture a screen and attach it, click Capture Screen. See Capturing screens.
4. Click Add.
The attachments are added to the Attachments area.
You can view, rename, download, and delete attachments. You can also edit image file attachments.
- To view an attachment, click the thumbnail or name. If the browser cannot open the file, it is automatically downloaded. You can then open the local copy in the associated application.
-
To rename an attachment, click Rename. The Rename Attachment dialog box opens. Enter a new Attachment name and click Rename. You can only rename attachments before saving the item. Do not include the file extension in the new attachment name.
- To download an attachment, click
 .
. - To edit an image file attachment, click
 . You can only edit images before saving the item.
 - To delete an attachment, click .
Note: You can only delete run results, or files attached to test runs after they were generated, from test runs. Expected results attachments are from the original test case and cannot be deleted.
5. Click Save to save the changes.


