Creating Libraries and IPs
This training page shows how to create new IPs and Libraries, list IPs and add resources to existing IPs.
Definitions
An overview of the terms Library, IP and IPV (IP Versions) in the Perforce IPLM context is available in the IPLM glossary.
If we take a look at the pi ip ls --contents command we can see what constitutes an IPV definition:
pi ip ls --content Command
> pi ip ls --contents tutorial.rxtx@LATEST.TRUNK
IP Version tutorial.rxtx@LATEST.TRUNK [@2]:
    Description               - receive/transmit
    Line Description          -
    DM type                   - Perforce (P4)
    Host                      -
    Repo Path                 - //mdx_test/tutorial/rxtx/TRUNK
    Resources                 - tutorial.gen_dig@2.TRUNK
    Current Aliases           - HEAD LATEST
    Historic Aliases          -
    Version Message           - test

    IP created on             - 2020-03-26 14:42:41 -0400 EDT by admin
    Line created on           - 2020-03-26 14:42:41 -0400 EDT by admin
    IP Version created on     - 2020-06-18 09:49:06 -0400 EDT by admin

  Project Properties:
    *                         - --path $IP

  Labels:
    No Labels defined.

  Property Sets:
    basic:
      IP Properties:
        auth_required         - N
        external_ip           - N
        internal_ipid         - INTERNA3445
        ip_lifecycle          - owned
        license_agreement     - INTERNAL
        license_class         - A
        license_expire        - 2025-01-31 07:00:00 -0500 EST (*)
        license_start         - 2018-06-15 08:00:00 -0400 EDT (*)
        owner                 - BU356
        process_name          - MS90G
        process_node          - 90
        vendor_id             - INTERNAL
        vendor_ipid           - INTERNAL
    feature_status:
      IP Version Properties:
        IPCategory            - Category7
        feature1              - OK
        feature2              - OK
        feature3              - OK
        feature4              - OK
        feature5              - Some Gaps
        feature6              - OK
        feature7              - OK
        project               - tutorial
    global:
      IP Properties:
        target_power          - 0.5 mW (*)
        target_size           - 1.0 sq-mm (*)
      IP Version Properties:
        coverage              - 22.0 % (*)
        power                 - 1.0 mW (*)
        regr                  - 100 /2000 (*)
        size                  - 1.0 sq-mm (*)

  Permissions on IP:
    Owner                     -
    Write Permissions         -
    Read Permissions          - g:tutorial

  Permissions on Line TRUNK:
    Owner                     -
    Write Permissions         -
    Read Permissions          - g:tutorial

  Hooks:
    No Hooks defined.

  Contents:
    Files
      docs/dita/rxtx_datasheet.dita#1
      docs/dita/rxtx_datasheet.ditamap#1
      docs/dita/rxtx_refman.dita#1
      docs/dita/rxtx_refman.ditamap#1
      docs/dita/topics/rxtx_details.dita#1
      docs/dita/topics/rxtx_intro.md#1
      docs/hw_design/blg_checklist.xlsx#1
      docs/hw_verify/blg_bug.xlsx#1
      hw_code/code/mt48lc32m16a2.v#1
      hw_code/code/test.v#1
      hw_code/filelist/blg.f#1
      hw_code/report/blg.rpt#1
      hw_code/report/statlinecount#1
      hw_code/test/test.v#1
      rxtx.pmq#1
      rxtx_doc.pmq#1
      sw_code/driver/blg_driver.7z#1
      sw_code/test/blg_driver_test.7z#1

Found 1 matching object(s).
Listing the ip with the --contents option shows all the details about the IP as well as the file list (the last section of the output under 'Contents'). The file list is a list of files that were part of the workspace for a particular IP when it was released. It consists of the path to the file along with the version of the file at the time of release.
Verbose (-v) Option
If the '-v' option was used rather than the '–contents' option, the output would be identical, except it would not contain the file list. See Listing IPs in the Catalog for more information.
The file list format of this IP release's contents is specific to the Perforce DM type. Other DM types would format their contents in a way appropriate for that DM, eg a SHA-1 for git.
Resource IPs and their versions are also captured at the time of release and shown under the 'Resources' heading.
Adding content to Perforce IPLM
Adding a Library
The PI database is organized in LIBRARY.IP format. A Library is a collection of IPs that are related in some way. Before you can add IPs to PI, you need to create a Library.
Only admins can create new Libraries.
The 'pi library add' command is restricted to admins only. If you aren't an admin, skip this step and add your new IP to the 'tutorial' Library. See Library Management for more information.
The tutorial data already has the Library 'tutorial' created, if you want to add a new Library you can use the following command:
> pi library add
which brings up a template form in an editor allowing you to specify fields for the newly created Library. To test creating a new Library, give the new Library a name, ie 'testlib', and save the template.
You may then run the following command:
> pi library list
which shows the newly created Library (along with any other Libraries that were already present). Use the '-v' or '--verbose' option (with or without the name of a specific Library) for more details:
> pi library list -v tutorial
Library tutorial:
    Description               - The Perforce tutorial SoC project, a mixed
                                signal automotive project based on TMS 90nm
                                technology
    Vendor                    - Perforce

	Created on                - 2018-03-15 11:05:41 -0700 PDT by admin
  Permissions on Library:
    Owner                     -
    Write Permissions         -
    Read Permissions          - g:tutorial

  Hooks:
    No Hooks defined.

Found 1 matching object(s)
The above output shows, for example, details for the 'tutorial' Library. Feel free to edit your newly created 'testlib' Library using:
> pi lib edit testlib
Adding IPs
Once you have created a new Library, you may add an IP to it, using the command:
> pi ip add testlib.ip1
This command will bring up an editor session with a template form allowing you to specify relevant fields for the IP to be added. The key fields to specify in the template are:
| Field | Description | Notes |
|---|---|---|
| dm_type | DM system storing the file data the IP will manage |
Default built in DM types are 'P4', 'SVN', 'CONT', and 'FS' (additional DM types can be added via the Custom DM mechanism). For the tutorial, set |
| repo_path | The location of the managed file data in the DM system |
A typical path will be something such as: For example: Note, however, that if somebody else has created an IP1 in an earlier tutorial session, you will need to pick a different unique path name. The 'mdx_test' in the repo_path is the Perforce depot name. The depot must exist prior to loading the IP into a workspace, the rest of the path can be created by Perforce IPLM. 'TRUNK' is the name of the default line created when a Perforce IPLM IP is created. The TRUNK line must always exist, other Lines can be created as needed. |
| description | An optional description for the IP | This description is displayed when the IP is listed in the IP Catalog, which can be accessed via either IPLM CLI or IPLM Web |
| version_message | (Required) A version message for the initial @0 IP version | The version message for the latest version of the IP is displayed in output of 'pi ip list' command (see below). |
More details on Creating IPs are available on the Creating New IPs page in the User Guide.
Once you save and exit the editor, the IP called 'ip1' is added to the Library called 'testlib' you previously created. Check that the IP was successfully added with the command:
> pi ip list ip1
┌─────────────────────┬────┬─────────────┬────────────┬───────────────────────────────┬─────────────────┐
│ NAME                │ DM │ ALIASES     │ CREATED BY │ CREATED ON                    │ VERSION MESSAGE │
╞═════════════════════╪════╪═════════════╪════════════╪═══════════════════════════════╪═════════════════╡
│ testlib.ip1@0.TRUNK │ P4 │ HEAD LATEST │ mdx        │ 2017-06-29 10:23:30 -0700 PDT │ First version   │
└─────────────────────┴────┴─────────────┴────────────┴───────────────────────────────┴─────────────────┘
The terminal period at the end of the Library name 'testlib.' is required for the command work. This syntax tells Perforce IPLM to list all the IPs in the Library 'testlib'.
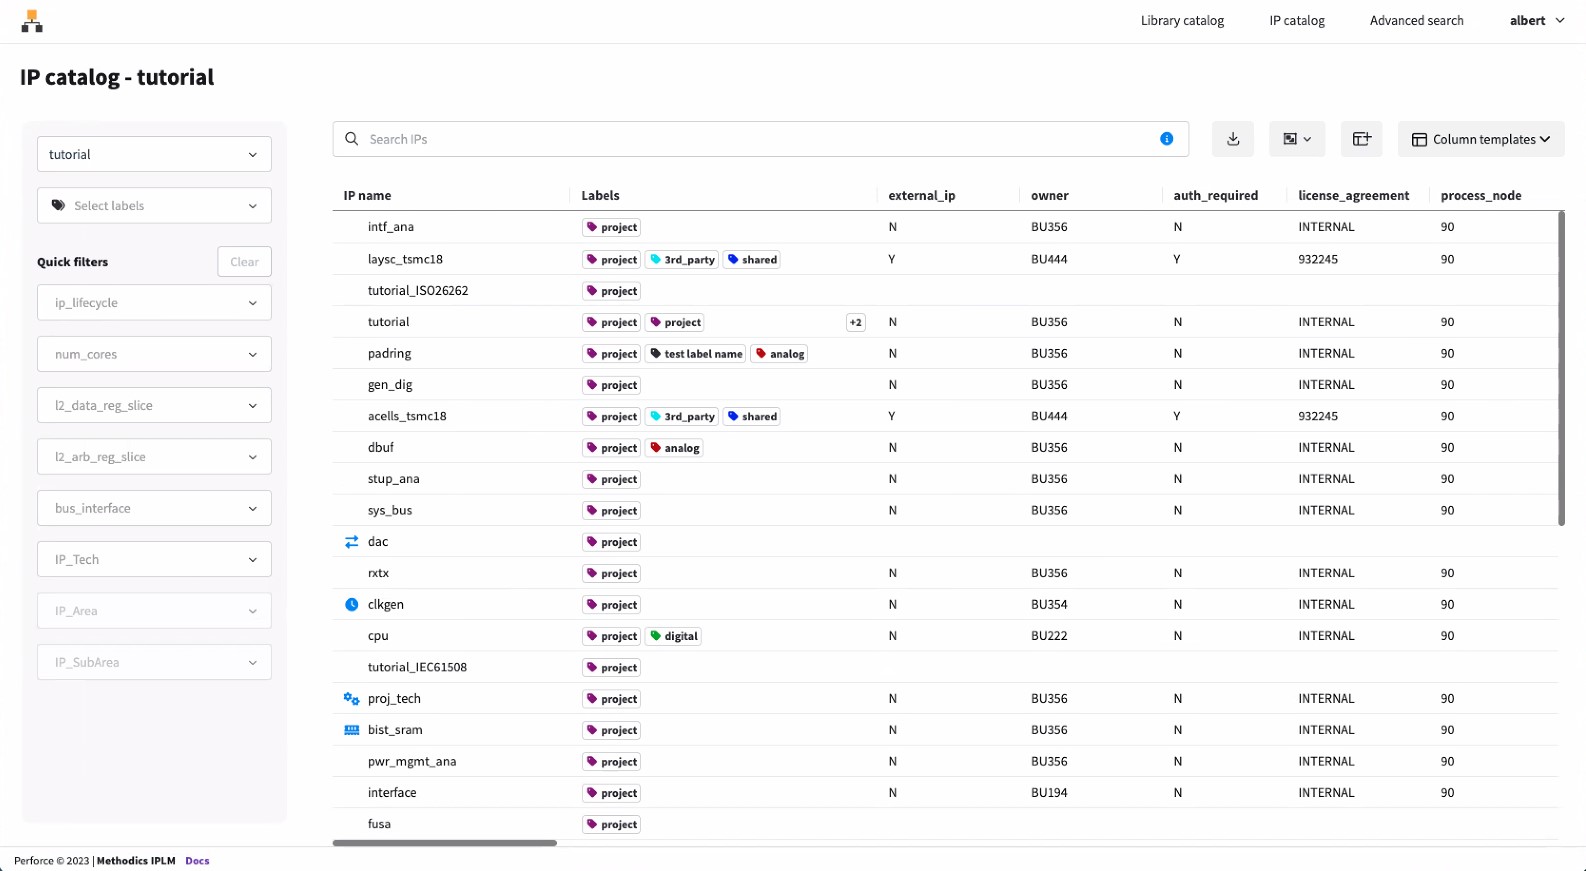
To list all the available IPs in the catalog, run the command without specifying a Library:
> pi ip list
┌────────────────────────────────────────────┬──────┬───────────────────────────┬────────────┬───────────────────────────────┬────────────────────────────────────────┐
│ NAME                                       │ DM   │ ALIASES                   │ CREATED BY │ CREATED ON                    │ VERSION MESSAGE                        │
╞════════════════════════════════════════════╪══════╪═══════════════════════════╪════════════╪═══════════════════════════════╪════════════════════════════════════════╡
│ testlib.ip1@0.TRUNK                        │ P4   │ HEAD LATEST               │ admin      │ 2020-06-18 20:43:12 -0400 EDT │ First Version of IP1                   │
│ tutorial.CADenv@3.TRUNK                    │ P4   │ HEAD LATEST               │ admin      │ 2020-03-26 14:43:14 -0400 EDT │ hier release                           │
│ tutorial.MS90G@1.TRUNK                     │ P4   │ HEAD LATEST               │ admin      │ 2020-03-26 14:42:19 -0400 EDT │ hier release                           │
│ tutorial.TAPEOUT_tutorial_A3350GS4@0.TRUNK │ CONT │ HEAD LATEST               │ admin      │ 2020-03-26 15:58:08 -0400 EDT │ Tutorial Tapeout A3350GS4              │
│ tutorial.acells_tsmc18@1.TRUNK             │ P4   │ HEAD LATEST               │ admin      │ 2020-03-26 14:42:15 -0400 EDT │ hier release                           │
│ tutorial.adc@1.TRUNK                       │ P4   │ HEAD LATEST               │ admin      │ 2020-03-26 14:42:22 -0400 EDT │ hier release                           │
│ tutorial.aes512@1.TRUNK                    │ P4   │ HEAD LATEST               │ admin      │ 2020-03-26 14:43:07 -0400 EDT │ hier release                           │
│ tutorial.analog_top@1.TRUNK                │ P4   │ HEAD LATEST               │ admin      │ 2020-03-26 14:43:17 -0400 EDT │ analog_top release                     │
│ tutorial.bist_sram@2.TRUNK                 │ P4   │ HEAD LATEST               │ admin      │ 2020-06-18 09:49:06 -0400 EDT │ test                                   │
│ tutorial.clk_mux@2.TRUNK                   │ P4   │ HEAD LATEST               │ admin      │ 2020-06-18 09:49:06 -0400 EDT │ test                                   │
│ tutorial.clkgen@1.TRUNK                    │ P4   │ HEAD LATEST               │ admin      │ 2020-03-26 14:42:32 -0400 EDT │ hier release                           │
│ tutorial.cpu@3.TRUNK                       │ P4   │ HEAD LATEST               │ admin      │ 2020-06-18 09:49:06 -0400 EDT │ test                                   │
│ tutorial.dac@0.TRUNK                       │ CONT │ HEAD LATEST               │ admin      │ 2020-03-26 14:42:20 -0400 EDT │ Initial version                        │
│ tutorial.dbuf@2.TRUNK                      │ P4   │ HEAD LATEST               │ admin      │ 2020-06-18 09:49:06 -0400 EDT │ test                                   │
│ tutorial.digital_top@3.TRUNK               │ P4   │ HEAD LATEST               │ admin      │ 2020-06-18 09:49:06 -0400 EDT │ test                                   │
│ tutorial.events_if@2.TRUNK                 │ P4   │ HEAD LATEST               │ admin      │ 2020-06-18 09:49:06 -0400 EDT │ test                                   │
│ tutorial.flash@2.TRUNK                     │ P4   │ HEAD LATEST               │ admin      │ 2020-06-18 09:49:06 -0400 EDT │ test                                   │
│ tutorial.flash_if@2.TRUNK                  │ P4   │ HEAD LATEST               │ admin      │ 2020-03-26 15:51:16 -0400 EDT │ releasing Mem.nor_flash                │
│ tutorial.fusa@0.TRUNK                      │ CONT │ HEAD LATEST               │ admin      │ 2020-03-26 15:58:07 -0400 EDT │ Initial version                        │
│ tutorial.gen_dig@2.TRUNK                   │ P4   │ HEAD LATEST               │ admin      │ 2020-03-26 14:43:22 -0400 EDT │ hier release                           │
│ tutorial.interface@4.TRUNK                 │ P4   │ HEAD LATEST               │ admin      │ 2020-06-18 09:49:06 -0400 EDT │ test                                   │
│ tutorial.intf_ana@1.TRUNK                  │ P4   │ HEAD LATEST               │ admin      │ 2020-03-26 14:42:30 -0400 EDT │ hier release                           │
│ tutorial.io5v@3.TRUNK                      │ P4   │ HEAD LATEST               │ admin      │ 2020-03-26 16:10:06 -0400 EDT │ hier release                           │
│ tutorial.io_tsmc18@3.TRUNK                 │ P4   │ HEAD LATEST               │ admin      │ 2020-03-26 16:10:06 -0400 EDT │ hier release                           │
│ tutorial.laysc_tsmc18@1.TRUNK              │ P4   │ HEAD LATEST               │ admin      │ 2020-03-26 14:42:17 -0400 EDT │ hier release                           │
│ tutorial.padring@1.L1                      │ P4   │ HEAD LATEST               │ admin      │ 2020-03-26 14:43:27 -0400 EDT │ padring L1 release                     │
│ tutorial.padring@1.L2                      │ P4   │ HEAD LATEST               │ admin      │ 2020-03-26 14:43:29 -0400 EDT │ padring L2 release                     │
│ tutorial.padring@1.L3                      │ P4   │ HEAD LATEST               │ admin      │ 2020-03-26 14:43:31 -0400 EDT │ padring L3 release                     │
│ tutorial.padring@1.L4                      │ P4   │ HEAD LATEST               │ admin      │ 2020-03-26 14:43:32 -0400 EDT │ padring L4 release                     │
│ tutorial.padring@7.TRUNK                   │ P4   │ HEAD LATEST               │ admin      │ 2020-06-18 09:49:06 -0400 EDT │ test                                   │
│ tutorial.proj_tech@1.TRUNK                 │ P4   │ HEAD LATEST               │ admin      │ 2020-03-26 14:42:39 -0400 EDT │ hier release                           │
│ tutorial.pwr_mgmt_ana@1.TRUNK              │ P4   │ HEAD LATEST               │ admin      │ 2020-03-26 14:42:34 -0400 EDT │ hier release                           │
│ tutorial.rx_channel@2.TRUNK                │ P4   │ HEAD LATEST               │ admin      │ 2020-06-18 09:49:06 -0400 EDT │ test                                   │
│ tutorial.rxtx@2.TRUNK                      │ P4   │ HEAD LATEST               │ admin      │ 2020-06-18 09:49:06 -0400 EDT │ test                                   │
│ tutorial.stup_ana@1.TRUNK                  │ P4   │ HEAD LATEST               │ admin      │ 2020-03-26 14:42:25 -0400 EDT │ hier release                           │
│ tutorial.sys_bus@2.TRUNK                   │ P4   │ HEAD LATEST               │ admin      │ 2020-06-18 09:49:06 -0400 EDT │ test                                   │
│ tutorial.t0@2.TRUNK                        │ P4   │ HEAD LATEST               │ admin      │ 2020-06-18 09:49:06 -0400 EDT │ test                                   │
│ tutorial.t1@4.TRUNK                        │ P4   │ HEAD LATEST               │ admin      │ 2020-06-18 09:49:06 -0400 EDT │ test                                   │
│ tutorial.timers@2.TRUNK                    │ P4   │ HEAD LATEST               │ admin      │ 2020-06-18 09:49:06 -0400 EDT │ test                                   │
│ tutorial.tool_cert@0.TRUNK                 │ CONT │ HEAD LATEST               │ admin      │ 2020-03-26 15:58:07 -0400 EDT │ Initial version                        │
│ tutorial.trc@1.TRUNK                       │ P4   │ HEAD LATEST               │ admin      │ 2020-03-26 14:42:28 -0400 EDT │ hier release                           │
│ tutorial.tutorial@1.L1                     │ P4   │ HEAD LATEST               │ admin      │ 2020-03-26 14:43:38 -0400 EDT │ tutorial L1 release                    │
│ tutorial.tutorial@1.L2                     │ P4   │ HEAD LATEST               │ admin      │ 2020-03-26 14:43:41 -0400 EDT │ tutorial L2 release                    │
│ tutorial.tutorial@1.L3                     │ P4   │ HEAD LATEST               │ admin      │ 2020-03-26 14:43:44 -0400 EDT │ tutorial L3 release                    │
│ tutorial.tutorial@1.L4                     │ P4   │ HEAD LATEST               │ admin      │ 2020-03-26 14:43:47 -0400 EDT │ tutorial L4 release                    │
│ tutorial.tutorial@7.TRUNK                  │ P4   │ GOLD HEAD ISO26262 LATEST │ admin      │ 2020-06-18 09:49:06 -0400 EDT │ test                                   │
│ tutorial.tutorial_IEC61508@1.TRUNK         │ P4   │ HEAD LATEST               │ admin      │ 2020-03-26 15:58:06 -0400 EDT │ hier release                           │
│ tutorial.tutorial_ISO26262@1.TRUNK         │ P4   │ HEAD LATEST               │ admin      │ 2020-03-26 15:58:05 -0400 EDT │ hier release                           │
│ tutorial.verif_config@3.TRUNK              │ P4   │ HEAD LATEST               │ admin      │ 2020-03-26 16:10:08 -0400 EDT │ hier release                           │
└────────────────────────────────────────────┴──────┴───────────────────────────┴────────────┴───────────────────────────────┴────────────────────────────────────────┘
'testlib.ip1@0.TRUNK' (or whatever you named your IP) will be listed in the output. See also IP Versions (Releases) in the User Guide for more information on IP releases.
The same Catalog is available from IPLM Web . Point your browser to <yourIPLMserver>:80 (default port) and log in with the same credentials you used on PiCLI. Browse to the IP Catalog, and your new IP will be visible there as well.
The menu display in IPLM Web will look different if you are not logged in as an admin user.
Adding Resources to an IP
An IPV release captures file content stored in the IP's DM repository, but it can also include other IPVs, which are called 'Resources' in Perforce IPLM. Adding or modifying resources to an IP will create a new release of that IP. Each resource IP can have its own set of resources. This is how IP Hierarchies are built up in Perforce IPLM. See the IP Hierarchy page in the User Guide for more information.
We will create a second IP to use as a resource. Any IP can be used as a resource of any other IP, regardless of its DMType or repository. The only limitation (which Perforce IPLM enforces) is that the overall hierarchy not include any circular references (where an IP at some point includes itself its own resource tree). Let's add a second IP, called 'stdcell', to the 'testlib' Library:
> pi ip add testlib.stdcell
...
INFO:pi:Successfully created IPV 'testlib.stdcell@0.TRUNK'
Note that the 'repo_path' field of the newly added IP should point to a different location in your DM repository. Now that a second IP has been created, it can be attached as a resource to 'ip1'. This is accomplished by editing 'ip1' as follows, adding 'testlib.stdcell' to the line beginning with 'resources = ':
> pi ip edit testlib.ip1
<EDITOR WINDOW>...
# Resources are optional
# One resource per line (newlines require a leading space)
resources = testlib.stdcell

...
<END EDITOR WINDOW>INFO:pi:Successfully edited IPV 'testlib.ip1@1.TRUNK'
Note:
- the full resource definition '
testlib.stdcell' has been specified. This allows you to add resources from any Library into an IP as desired. - adding a resource to an IP automatically triggers a release and generates a new version of the IP.
- the '
testlib.stdcell' IP hasn't had any files checked in to an associated Perforce location yet. Therefore, any workspace load will result in an empty IP directory.
Library types and naming
Normally Libraries fall into one one of two types:
- Global Libraries: contain IPs that are generally available for use by multiple teams and projects. They might contain IPs that are more universal, and have wide applicability.
- Project Libraries: contain IPs that are designed for specific projects. These IPs may be more limited in their scope, and often only relevant to their particular projects.
There is nothing inherently different about these two types - they are both simply Perforce IPLM Libraries. However, it helps to think of these as different based on their content. More information on Libraries is detailed on the Library Management page in the User Guide.