You can manually create the same workflow as Jira in P4 Plan if you do not want to create them automatically. To help you get started and understand how workflow matching works, use an example Jira workflow. In the Edit workflow dialog box, click More, choose Example workflows, and click Example Asset – Jira default workflow.
You can also import the default workflow XML file (jira_default_workflow.xml) from the integration installation directory to P4 Plan. To import a workflow, click More and choose Import to this view from XML.
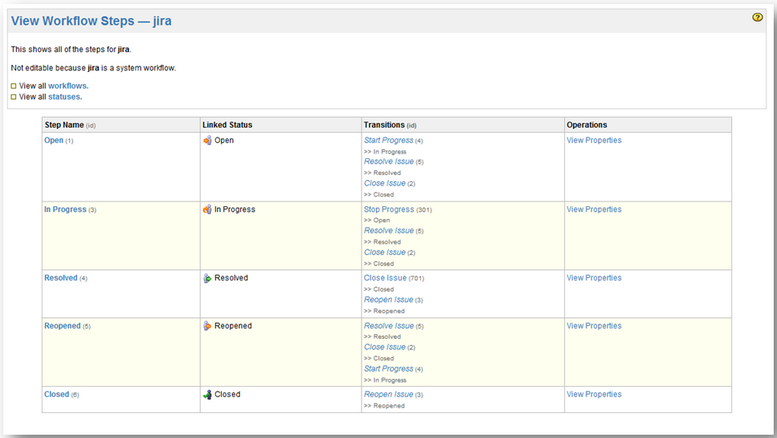
The following image shows the steps of a standard Jira workflow.
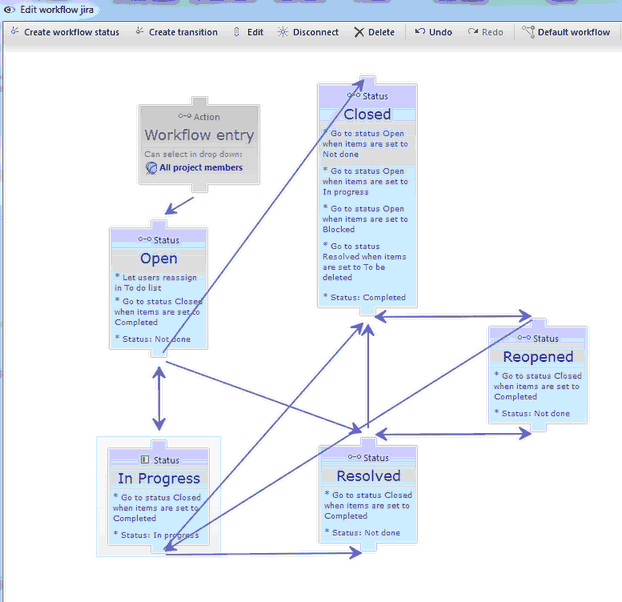
The following image shows the corresponding workflow in P4 Plan.
To understand how it works, look at the Open status. In Jira, the open status is connected to the In Progress, Resolved, and Closed statuses through the Start Progress, Resolve Issue, and Close Issue transitions.

In P4 Plan, set up the Open status and corresponding transitions (named connections in P4 Plan) as shown in the following image.
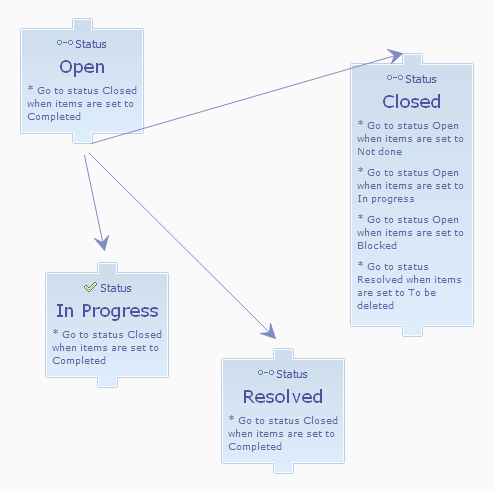
Make sure you set up transitions for each status in the workflow.
Transition rules
In Jira, rules for workflow progression are set up in the transition connecting two statuses. In P4 Plan, a connection simply connects two statuses and does not have any rules.
Transition rules are set up within each status or in a specific transition connection between two statuses.
For example, if you want specific data to be entered for a user to move the workflow to the next step, edit the Open status. The following example shows that a new comment must be added to an item before it can move to the next step in the workflow.
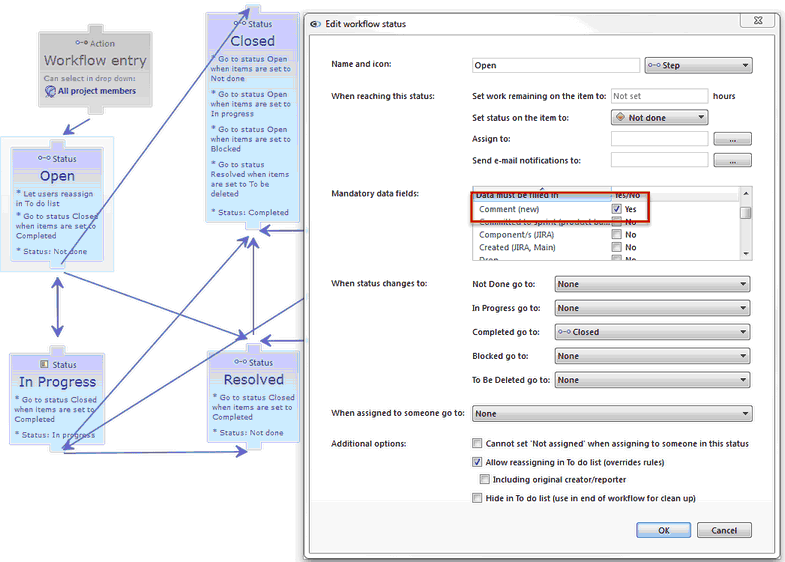
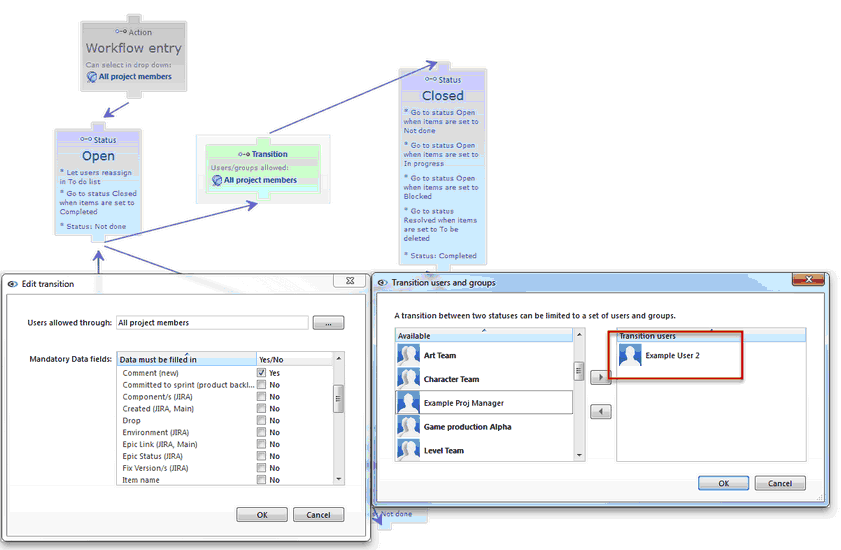
The new comment is required regardless of the status the user wants to move the item to. If it is required to move to a single status, create a transition. The transition must specify that a comment must be entered before moving to the next status. You can also specify the users or groups that can make the transition.
Jira resolution settings on P4 Plan workflows
In Jira, a resolution is a required field for some workflow statuses. In P4 Plan, you must set a Jira resolution for each workflow step in P4 Plan where it is required or where it should be cleared.
To change the Jira status mapped to a P4 Plan status, right-click a status in the P4 Plan workflow editor and choose Jira workflow settings. Notice that the Jira status is set to Match by status name by default. This default setting means that the statuses of items is the same between Jira and P4 Plan. If you want to map a P4 Plan workflow step to a different Jira workflow step, you can select a different value. We recommend using the same status names between applications to avoid confusion.
To specify the value of the Resolution field in Jira when the workflow reaches a specific step in P4 Plan, select a Jira resolution. For example, if you want items with a Closed status to have a Fixed resolution in Jira, select Fixed. If you want to clear the Resolution field when moving from one status to another, select No resolution. For example, to clear the Resolution when an item moves from Closed to New, edit the New status in and select No resolution in the Jira resolution field.
In Jira, you can have different resolutions for the same workflow. For example, an item with a Closed status could have a resolution of Fixed or Will Not Fix. To support multiple resolutions, create a workflow step for each alternative in P4 Plan and map the resolutions to match. To avoid confusion and make it clear to users, we recommend naming your P4 Plan workflow steps with the same name as the resolution.
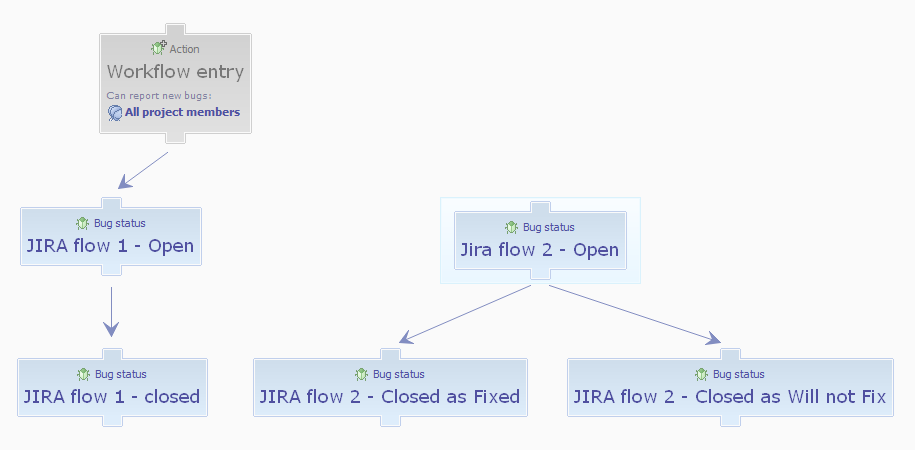
The following example shows a P4 Plan QA workflow that supports two Jira workflows. One of the workflows has two Closed statuses with different resolutions.
