Customizing shortcut menus
You can customize the available items on list window and Specification Document shortcut menus for quick access to actions you perform frequently.
1. Choose Tools > Users Options then select the Shortcut Menus category. You can also right-click an item in a window and choose Configure Menu.
2. Select a List window. The available menu items depend on the selected list window.
3. Select the item you want to add in the Available menu items list and click  to move it to the Current menu items list.
To remove an item, select it in the Current menu items list and click  to move it to the Available menu items list.
4. Select an item in the Current menu items list and click Top, Move Up, Move Down, or Bottom to change the display order. You can also move the <separator> to divide the menu.
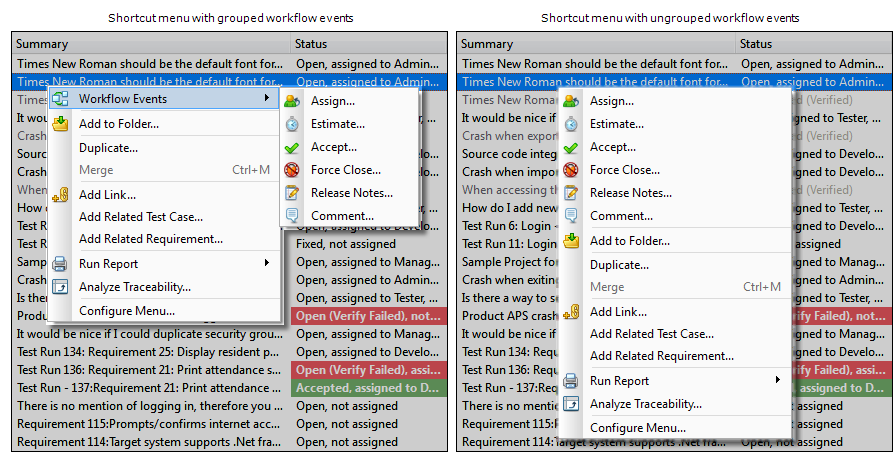
5. Select Group workflow events in a sub-menu to group events in a Workflow Events sub-menu.
You may want to select this option to make the menu for the selected list window more manageable if your team's workflow has a large number of events.
6. Click Reset to reset the selected list window menu to the default list and order. See Default shortcut menu configurations.
7. Click OK to save the changes.
Default shortcut menu configurations
The following items are included in the default shortcut menus.
- <workflow events>
- <separator>
- Add to Folder
- Remove from Folder (Folders list only)
- <separator>
- Duplicate
- Merge
- <separator>
- Add Link
- Add Related Test Case
- Add Related Requirement
- <separator>
- Run Report
- Analyze Traceability
- <separator>
- Configure Menu
- <workflow events>
- <separator>
- Add to Folder
- Remove from Folder (Folders list only)
- <separator>
- Create Snapshot
- Duplicate
- <separator>
- Add Link
- <separator>
- Run Report
- Analyze Traceability
- <separator>
- Configure Menu
- <workflow events>
- <separator>
- Add to Folder
- Remove from Folder (Folders list only)
- <separator>
- Change Requirement Type
- Duplicate
- <separator>
- Add Link
- Add Related Issue
- Add Related Requirement
- Generate Test Case
- <separator>
- Create Requirement Document
- Append to Requirement Document
- <separator>
- Run Report
- Analyze Traceability
- <separator>
- Configure Menu
- Add Existing Requirement
- Add Requirement as Sibling
- Add Requirement as Child
- Remove Requirement
- <separator>
- <workflow events>
- <separator>
- Add to Folder
- Remove from Folder (Folders list only)
- <separator>
- Edit Requirement in Detail Window
- Change Requirement Type
- Duplicate
- <separator>
- Add Link
- Add Related Issue
- Add Related Requirement
- Generate Test Case
- <separator>
- Create Requirement Document
- Append to Requirement Document
- <separator>
- Run Report
- Analyze Traceability
- <separator>
- Configure Menu
- <workflow events>
- <separator>
- Add to Folder
- Remove from Folder (Folders list only)
- <separator>
- Duplicate
- <separator>
- Add Link
- Generate Test Runs
- <separator>
- Run Report
- Analyze Traceability
- <separator>
- Configure Menu
- <workflow events>
- <separator>
- Add to Folder
- Remove from Folder (Folders list only)
- <separator>
- Duplicate
- <separator>
- Add Link
- Add Related Issue
- Regenerate Test Runs
- <separator>
- Run Scripts
- <separator>
- Run Report
- Analyze Traceability
- <separator>
- Configure Menu


